Tuesday, July 29, 2014

The Scrappy Crossroads Quilt - Round 2

After making the first Scrappy Crossroads Quilt, I was inspired/driven/obsessed crazy woman on a mission to clean up my scrap basket and cut up all those random scraps into squares (2.5" and 5") for more scrappy quilts or into sizes for some new zippered pouches that I'll eventually get around to making and posting on my Etsy shop (see what I mean about my in progress project list getting long...).  
 The two piles on the front left of the above picture are about 1/3 of the scraps I sorted through.  You can see the nicely stacked piles of scrappy squares at the top of the picture.  I ended up with two stacks of 2.5" squares about 12 inches tall!  It was time for round two of the Scrappy Crossroads Quilt - this time in boy colors and prints. 
I pulled all of the orange, yellow, blue, green, boy novelty prints, and a few black and red squares as well.  Wow - it's going to be one fun and bright quilt!  I cut up some Kona Coal (my current solid big time crush) to use for the background blocks hoping that maybe it will help to tone down some of the brightness of the quilt.  I spent a few minutes here and there on Saturday playing with the arrangement of the scrappy squares, sewing the squares all together and making the easy corner triangle blocks.  
Sunday dawn to an overcast sky and shortly after we got back home from church, the storm clouds had officially moved in and it ended up raining and thunderstorming off and on for the rest of the day.  Which meant that we didn't do very much around our house so during nap time, I delved back into sewing together the top of this quilt.  With a few breaks for food, a mad dash to JoAnn's for their 70% coupon (good only Sunday) on all of their sewing notions (I scored 6 bottles of spray baste for the price of 2!!), and the boys' bath time, I kept working on this quilt all afternoon and into the evening.  After the boys' bed time, I was able to quickly spray baste the quilt and go to town on quilting it!
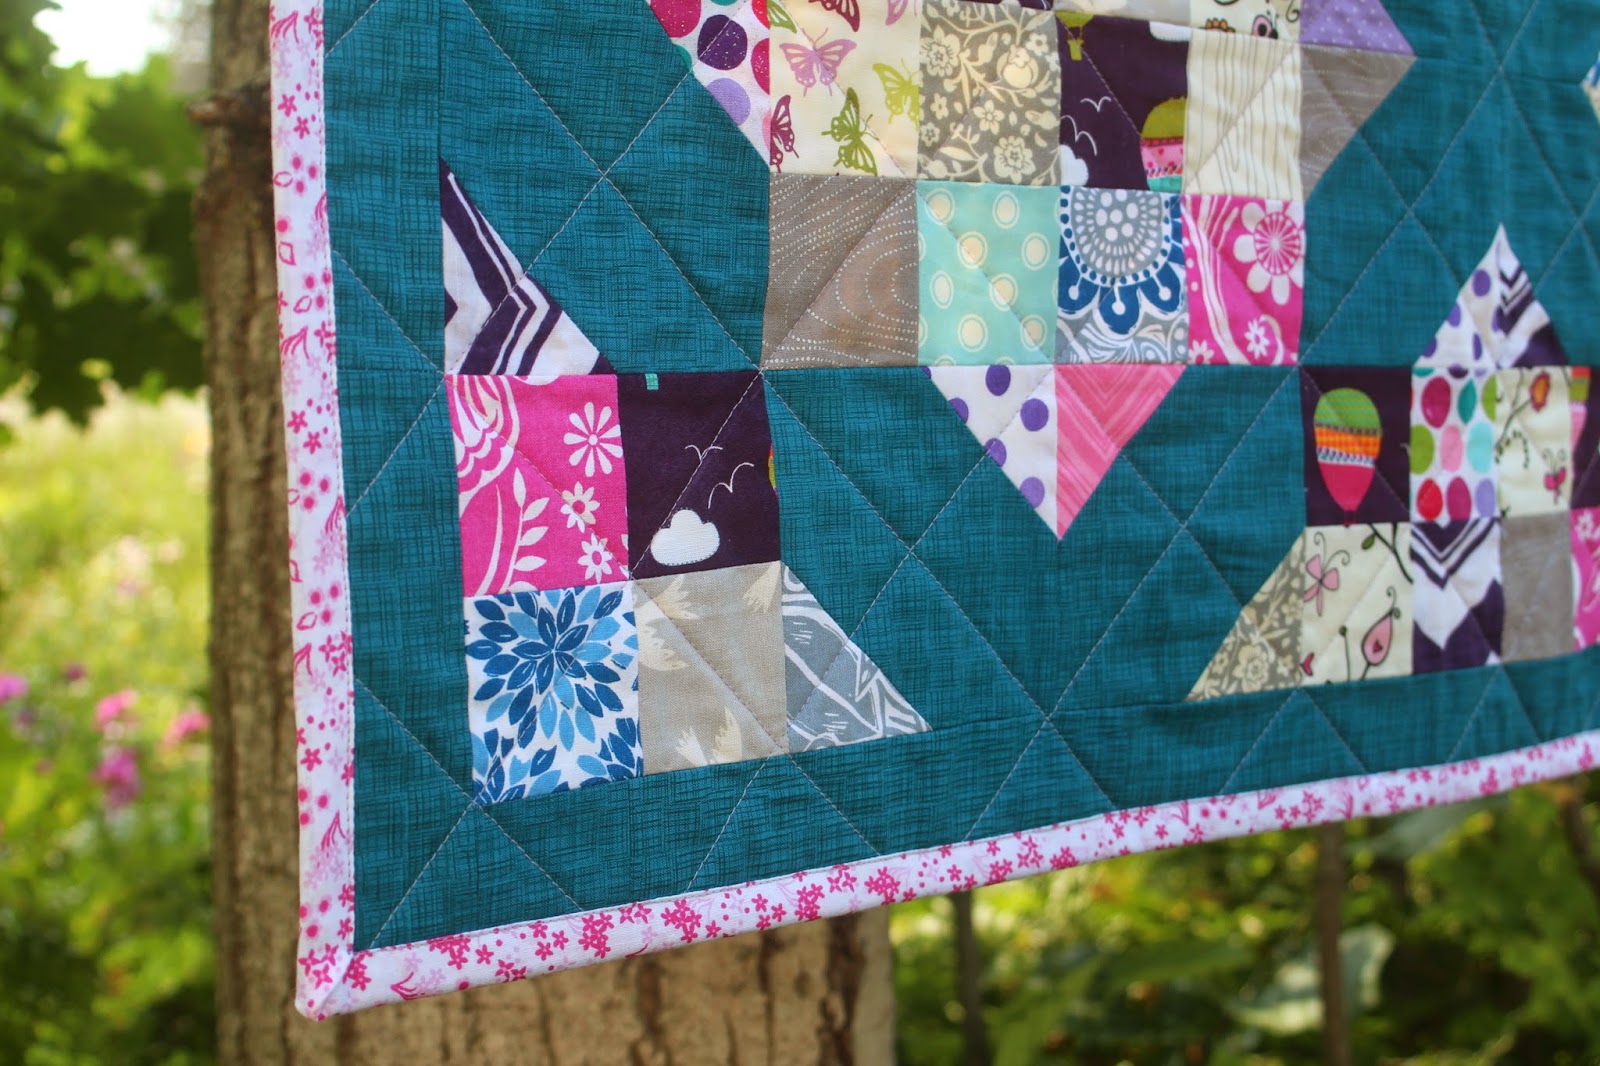
I just did a simple straightline quilting pattern on this quilt and since its a baby sized quilt, it didn't take long at all to quilt.  I also had the binding all done, so before going to bed I got that sewn on as well which meant I got this Scrappy Crossroads Version 2 quilt done before bedtime.  Although I did stay up a little later than I should have, it was still so very worth it.  :) 
The next morning, Little Bear found it sitting on the table all done and instantly had to claim it as him own long enough to drag it around the living room and through his toys for a bit before he promptly moved on to other things like his lucky charms breakfast cereal! hehe 
 Thankfully, the sun decided to come out during the boys' naptime so I was able to snap a few good pictures of it. 
 I just love how bright and fun this quilt is.  And it is cool to see how different fabric choices can make the same quilt pattern look so very different. 
Although my boys would most likely love this quilt, they both all ready have more quilts and blankets than they know what to do with, so this quilt is all ready listed in my Etsy shop waiting for a new home.

Stay tuned for more sewing madness ;)

~maggie


Monday, July 28, 2014

Thinking Pink

 So since my family had been inundated by baby boys over the last could of years, I find that so much of my sewing revolves around boy colors and boy novelty print fabrics. Which while a lot of fun, can seem a little one dimensional. Thankfully, I have friends who have and are having baby girls!  Earlier this month I got to pull out some pink fabric and go all girly in my sewing.  And while not a pink or girly girl myself, I still loved the change in pace with my sewing. 
At the end of June I needed a quick, easy, cute and practical gift for a very specially lady who has been such a sweet lady in my life since our move here to Michigan last fall.  She was expecting her 4th baby girl and I wanted to make her little girl something special.  After checking out her baby registry and noticing that she had baby bath towels on there, I decided to put together a set of hooded bath towels for her.  I had made some previously for my new baby and for one of my nephews which you can find here and here
After making up my own template for a flower applique pattern, I used some pink and purple fabrics in my stash for the applique and the binding around the edge of the towels.  I had picked up these aqua colored towels from Target on a sale since there weren't any nice girly colored ones.  As a happy coincidence, this color blue happens to be my friend's favorite color! :) 
Another friend of mine whose son used to go to the same daycare as my son when we lived back in Buffalo, New York follows me on Instagram and when I posted a picture of the car seat canopy I made for our (at that time) unborn baby, she insisted that I make her one as well.  Since she isn't due with their baby girl until the end of summer, it was put on the waiting list until after our baby was born.  
So, Baby was born and I was getting back into the swing of things with my sewing.  After some going back and forth with my friend, we got the fabric picked out and I had so much fun sewing together a very girly hot pink and whimsical car seat canopy for her baby girl!  The pattern is by Elizabeth Wyatt and a PDF download of her pattern can be found in her Etsy shop here
 
I also whipped together two wet bags and a pacifier leash/clip out of the left over pink and black materials but I forgot to snap a picture of those before I shipped everything out to my friend.  
Now that I've had a taste of sewing for girls, I'm excited to make more adorable items for little girls in my future.  Maybe my Etsy shop will stop looking a little lop-sided with so much boy stuff! ;)
Stay tuned! 

~maggie

 *The picture at the top of this post was taken of the flowers and ferns that are growing like crazy in the empty lot next to our house.  Simply gorgeous!  


Sunday, July 27, 2014

Superheroes and Little Boys

Within the past three years, I went from having no little boys in my life to having two sons and five nephews!  Yup, that's seven(!) amazing little boys and not a single girl.  But I wouldn't trade a single one of them as they all are just the best. 
Here in the month of July, two of my nephews (who are also brothers) have birthdays!  Well actually, they will have birthdays together in the month of July since the younger one was just born this past week.  Anyways, I wanted to make a little something special for the older nephew who was having his second birthday this July.  His daddy is quite obsessed with superheroes and when I spotted this bright batman and superman novelty fabric into Joann's the other day, I knew just what I wanted to make for him.  I ended up whipping together two open wide zippered pouches (by Anna at Noodlehead) and a drawstring backpack.  I used Jeni's (of In Color Order) drawstring bag pattern as the basis for the backpack and with a few minor adjustments including sewing the drawstrings into the bottom corners of the bag, it turned out pretty well.  These bags will be perfect for storing all the treasures that any little boy has.
Little Bear also helped me to pick out some superhero toy cars for his cousin.  These finished up our box of present and after only 2.5 weeks in the mail, the package of presents found its way to my nephew just in time for his birthday.  My sister says he loves the gifts...although he thinks the bags make excelent hats!! 
More superheroey adventures to come I'm sure as my husband, brother-in-law, and little bear were all eying these bags as their own!
Stay tuned!

~maggie


Saturday, July 26, 2014

The Arkansas Scrappy Crossroads Quilt


 It all stared Sunday afternoon when Lori Holt from Bee In My Bonnet posted a scrappy crossroads block she was working on onto her Instagram feed.  The response was so positive to this super cute block that she decided to put together a quick Instagram tutorial with instructions and shortcuts on how to make this block.
It was love at first sight with this block.  I knew that my scrap bin was starting to reach critical mass, so I jumped aboard the quilt along associated with her tutorial.  Next thing I know, I've got my scrap bin out on the counter and I'm pulling out my most recent favorite fabric scraps and building a pile of coordinating scraps in shades of blue, gray, pink and purple.  As I was digging through my scrap basket, I realized that I had enough scraps of the Turkish Crosshatch blue left over from making this Cargo duffel bag and these divided baskets (patterns are both by Anna at the Noodlehead blog) to use as the background pieces in this block.  
I had been hoarding those blue scraps looking for just the perfect project to use them in and this scrappy crossroads block seemed like just the right thing.  I also realized that I had plenty of scraps in the colors I was pulling to make 4 of these blocks.  Since each block's finished size is 16", 4 blocks together would make the perfect sized baby quilt.
Let's just say I was obsessed with getting a block done so everything else Sunday afternoon & evening was put on hold (except for feeding the kiddos of coarse).  And before I went to bed that evening (much later than I should have), I had the first of the 4 blocks all sewn together and the other 3 blocks all laid out and ready for my sewing machine. 
 Over the next two days in between spending time with the in laws and going to the beach (Little Bear LOVED beach day!!), I managed to sneak in a few minutes here and there and get all 4 blocks done, sewn together, a boarder put on, the quilt basted (hurray for spray baste!), quilted, and bound! 
Side note... I was so proud of myself on how the binding turned out.  I always machine sew on my quilt bindings as I'm too lazy and impatient to hand sew them on.  Slowly I've been getting better at my technique through trial and error, and this quilt was the first time that the binding turned out perfectly!  My stitch line didn't slip off the binding on the front or run over the binding on the back!  Oh and look at this corner - it's prefect!! (Happy dance!)
I finished this beauty up Tuesday night, and as excited as I was on how it turned it (I couldn't stop starting at it!) I made myself wait until the morning to properly photograph it outside.
I'm so glad I did wait to photograph it properly as the morning sun and the spot next to the house where I like to photograph my quilts did this beautiful quilt far more justice than the poor lighting and my living room floor every could have. 
I must admit... This quilt was officially my first all scrap and solely from my stash quilt. 
The back is even a little scrappy as the gray floral I wanted to use for the back has a big piece cut out of the corner, so I added in a corner of people and love how that turned out.
I can't get enough of starting at this quilt.  I love love love it!
But...
I have boys and so a pretty quilt with pink and purples in it might not get much use around here.  So I decided to list this quilt in my Etsy shop hoping that someone will buy it and this quilt can find a happy home where some little girl will love it. 
Plus, this girl needs to fund a serious sewing addiction. ;)

And one final note....  Make a scrap quilt has made me obsessed with cleaning up my scrap bin and cutting all of my scraps into sizes that I know I will use.  I'm sure you will be seeing more scrap projects from me in the near future provided that I don't get project ADD and jump into another project from my ever growing list of half started projects.  
Stay tuned!

~maggie

P.s. who doesn't love a baby on a quilt? ;)

Thursday, July 24, 2014

Oh Hello!

I just checked on my blog today, and I realized it's been almost 4 months since I wrote a blog post!!  Eeep what happened?  Oh yeah -  Life is what happened.  
The first thing that happened is I got addicted to Instagram - big time (which you can find me at Magalin0229).  While I was at Camp Stitchalot in March, I was introduced to Instagram and told that I had to check it out.  Well, I checked it out and I'm hooked! I love the instant gratification that comes from sharing things I'm working on and things that I've literally just finished!  And for a mom of two little boys on the go - it's perfect!  And yes, I "overgram" my boys.  But when you have two cuties, it's hard not to do. 
And the second major life thing that happened to make me go MIA for a bit was this little cutie was born!!  
Say "hi" to Wesley David!  I seriously could not have asked for a cuter or more content little boy.  He is perfect and I'm quite taken with him.  His older brother (Little Bear) goes between being completely taken with Wes and completely ignoring him. 
So yes, Life happened.  But trust me, this girl's sewing machine hasn't been neglected at all!  If anything, even when I don't have time for anything else, I've made time to sit at my sewing machine for even 20 minutes here and there. In the midst of the final months of pregnancy and the first (almost) two months of having a little baby around, sewing has really been my sanity.  Which when I explain it to most people they just look at me funny and even my sweet husband who is so supportive still thinks I'm a little crazy and obsessed when it comes to sewing.  But I refuse to give it up!  Sewing - even sewing for others - is MY thing just for me.  
The first project I jumped into after baby Wes was born was three open wide zippered pouch by Noodlehead.  After having a kind of rough birth experience with Little Bear, the birthing experience we had with Wesley was a relief and so easy and I attribute so much of the positive experience to two amazing nurses and midwife who were in attendance during everything.  I wanted to make them something special as a thank afterwards and a few days after we got home from the hospital and life started to kind of find it's new rhythm, I sat down at my sewing machine, pulled out some fiercly hoarded fabric and whipped together these three pouches.  
I made sure to stuff them with goodies before I sent them out too.  
Lots more sewing and creating and life have been happening since our little guy was born.  I really do intend to get back into sharing some of it here on my blog because as great as Instagram is, I miss sharing the process with you all. 
Stay tuned!  

~maggie
 

Sunday, April 6, 2014

Quiet Book - Page 10: Cat & Dog Collar Buckles

The final page for the quiet books was dedicated to house pets - specifically a cat and a dog.  Which is perfect because the parents of one of the little ones are cat lovers and owners and the other set of parents were pug parents before their little one came along.  I wanted some kind of fun motor skill activity for these pages so I added a chunky color with a buckle.  I know my Little Bear was so proud of himself when he figured out how to make a buckle work!
Plus, how fun are those tails?  I discovered just how much fun it was to sneak in some 3-D features into these books and these tails - especially that curly pug tale - were no exception. 

Thank you, dear reader, for sticking with me on my overload of quiet book cuteness!  I promise, I'll be moving on to other fun projects I've been working on and dieing to share with you all very soon. 


Saturday, April 5, 2014

Quiet Book - Page 9: Frog & Flies Snaps

As I approached the second to last page for these quiet books, I knew I wanted to really focus on some fun fine motor skill activities that the little ones could play with.  I stumbled across several pages of a frog sitting on a lily pad using a snap on his tongue to "catch" the flies buzzing about his head.  Such a cute idea!  Using my very best free-hand drawing skills, I managed to pull this page together.  Which I have to tell you wasn't easy given the numerous re-draws I had to do since my free-hand drawing skills are a bit lacking.  But after only a few re-started, I had a template for this page I really liked. 
At this point of putting together the quiet books, I think the quiet book craziness had overtaken me and as you can see there is a ton of small details on this page.  Small details like the tiny wings on the flies to the veins in the cattail's leaves.
And more details like the frog's cheery smile and long tongue to the veined ribbing of the lily pad he is sitting on. 
There were far too many thread color changes on my sewing machine when I was putting this page together.  But, all that extra effort on this page was really worth it.  After all, I somehow managed to make even the flies on this page look cute!  Cute flies, what?

Quiet Book - Page 8: Lacing & Tying

What little girl hasn't at one point or another dreamed of becoming a ballerina? Even if that dream lasted but for a moment.  I'll admit that even I - a self-proclaimed tom boy while growing up - recall a few brief moments when I wanted to be a ballerina.  Besides, lacing up a pair of ballet shoes is much more fun than lacing up a pair of plain old every day boring shoes. 
Hopefully the little this page is intended for, will love lacing up this ballerina's slipper and maybe someday dream - even for a brief moment - of swirling around in a poofy tutu. 
Naturally, since the second of the two quiet books I made was for a little boy and not a little girl, I had to come up with something a little different for his book.  Luckily, I didn't have to look far for inspiration.  This little guy's daddy is a huge sports fan!  And what is one of the most popularized sports in America?  Football!
 I'm sure this football doesn't meet proper specification of what a football is supposed to look like, but ehhh it's close enough.  Besides, my football is perfect for lacing up and learning how to tie bows on.  

Friday, April 4, 2014

Quiet Book - Page 7: Zipper Camping

It's no secret that my husband and I love to go camping.  So much so that camping seems to be a running theme in most of our vacations over the past (almost) 5 years since we have been married.  And we are so crazy about camping that we have managed to talk some of our non-camping friends and family members to join in on the fun.  It just so happens that the mothers of the two littles that these quiet books are for are not the biggest camping enthusiasts we know, but we have had some amusing camping adventures with them in the past.  It seemed fitting to include a camping page into the quiet books especially after seeing several camping theme zipper pages that I loved on Pinterest.  Combing some of the best features from the pages I used as inspiration plus adding some personal touches, I came up with this page:
My favorite part of this page is the bear hiding inside of the tent!  Hopefully he is a night time lovey and not a rough camp scavenger.  ;) 
While looking at beads for a different project, I found these lovely fat star beads.  They add such a nice 3-D element to this page and I love that they almost shine and twinkle in the light like real stars do.
A few additional details on this page include the little pine trees in the background and the merrily crackling fire in the foreground.  It's lovely how all of the details of this page come together so beautifully and remind me of a warm summer evening spent next to a dancing campfire under the open skies. 

Quiet Book - Page 6: Counting

My husband, a self proclaimed numbers geek, believe that number are more universal and important than letters.  Which could very well be true in his world of engineering, so I humor him.  Debating aside, learning to count is a great skill to learn early on.  I had made an abacus page for the original quiet book I made for Little Bear and I had like it enough to consider doing another abacus page for these two quiet books.  I wanted to change things up a bit though and went for a slightly simpler and cleaner look for the abacus.
An added bonus and fun feature of the abacus is that I used the little guy's name for one of the rungs on the abacus.  Gotta love short names!